
Making music is an art, but building a perfect-sounding soundtrack requires mixing skills.
You may pick the best-sounding loops, play a stunning guitar solo, and make audiences cry with your selection of piano chords, but without “mastering the skill of mixing” (pun intended), your tracks will still sound muddy and buzzy.
Fortunately, it’s possible and fairly easy to create better-sounding mixes from day one.
In this blog, we share valuable tips for mixing music to help you bring the best tone out of each stem in your track.
So, turn on your DAW, open your track, and let’s get started.
Table of Content
|
|
|
|
|
|
|
|
|
|
|
|
|
|
|
|
IMPORTANT NOTE: If you are a beginner at mixing, we suggest you create a copy of your track before mixing music. This will allow you to start back with your track if the initial attempts don’t reap good results. Also, it helps track your progress after the mix is ready.
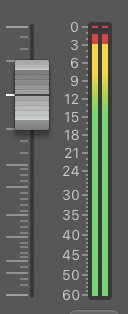
Gain Staging – Levels
In this step, we ensure all the stems in our track have enough headroom and are neither clipping nor flooring.

Importance
Whether you record a track stem by playing into the midi keyboard, or take one from the loop library, floor noise or clipping noise may be present.
A general idea to eliminate this noise could be to record the stem at low volume and gain it up later. However, this will increase the floor noise, and as we gain up the stem later, all the floor noise elements will also gain up.
Similarly, recording at high volumes will have too much clip noise, with little to no room for refining the mix.
Hence, we prefer recording on mid-range volumes so there is enough headroom. Also, once we have recorded our best take, it’s time to gain stage the stem.
How to Do It?
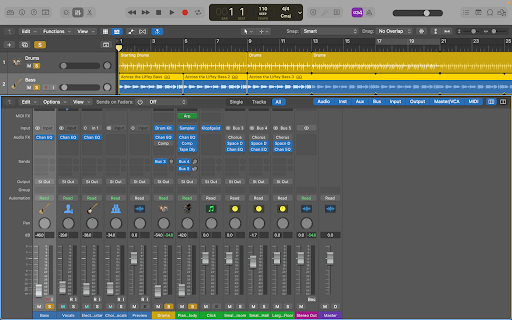
For gain staging, we have to first record our instruments and other track stems on mid-range volume so the channel strip is neither clipping nor flooring.

After recording all the stems in the right volume range, it’s time to lower the levels for all the stems. For best results, producers recommend lowering the volume to the point where you can barely listen to the instrument playing. It’s advisable to solo the particular stem before doing this.
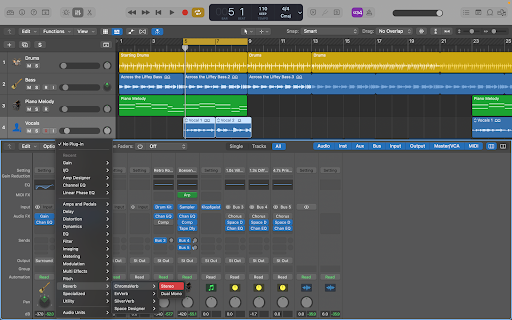
Note: It’s also important to convert instruments with bass frequencies to mono.
To do this, select a stem, click “X,” scroll to the plugin area, go to “Utility,” and add a “Gain > Dual Mono” plugin. A small window will pop up; click on the drop-down menu and select “Convert to Mono.” This will help make your bass sound more spacious.
Reverb
Ever noticed the mild echo effect present in most of the lofi songs? That’s reverb; if you are producing music, you’d probably already know that.
Importance
Reverb is an effect that gives your track more room, along with a trailing sound of the stem you have reverbed. The primary reason musicians use reverb is to give their track an echo effect. If you can use reverb correctly, your track can instantly sound better. However, an unhealthy amount of reverb can make your track contrastingly unpleasant to the ear.
Let’s find out how we can use it.
How to Do It?
Adding basic reverb to a stem in LogicPro is easy.
Select the stem you want to reverb, open the Mixer window (type “X” or click on the “Mixer button”), add a reverb plugin of your choice, and a window will show up.
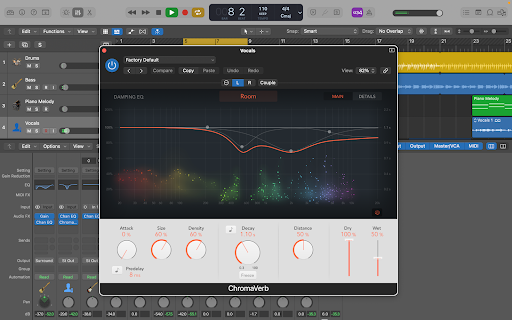
This is the window where you can make adjustments to add or remove reverb from your stem.
Size signifies the room size for echo. By adjusting decay levels, you can alter the time sound reflections take to fade away. Similarly, distance sets up how far the reflecting surfaces are.
As a beginner, you can toggle between options, experiment a bit, and figure out what amount of reverb is working for your song.
EQing
In this process, we filter out unpleasant frequencies from different instruments in our track. This helps bring these stem sounds in their natural sonic range, making them sound optimally highlighted and less muddy.
Importance
Many times, when you record a stem, some unwanted frequencies may get recorded. For instance, most of the bass frequencies lie in the range of 0-250 Hz. However, when recording a stem, due to instruments’ disturbances, room noise, human error or any other reason, other frequencies may also be captured. Thus, your bass stem may also have frequencies as high as 2000 Hz.
In this case, to make your bass sound more bassy and less muddy, it’s important to filter out the undesired frequencies.
How to Do It?
As we took the bass example, let’s see how to EQ a bass guitar stem in your track.
Step 1: Solo Bass, Drums and Lead
A common mistake many beginner producers make is soloing the stem they are focussing on and then EQing it alone.
This eliminates the track’s perspective as a whole. For the best-sounding audio mixing results, it’s best to solo drums, lead, and bass, along with the stem you are focusing on.
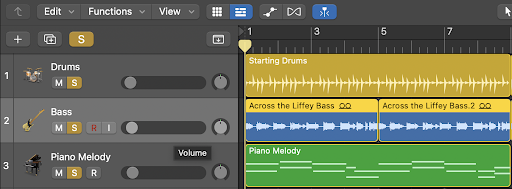
In LogicPro, you can click on the “S” to solo a stem. Once clicked, it’ll turn yellow by default.
Step 2: Open Channel EQ
Select the stem you want to EQ first and press “X” on your keyboard, or click the “Mixer Button,” in the toolbar.
This will display the Mixer setup, where you can click on the channel strip of the stem you want to EQ. In this case, we are EQing bass, so we’ll select that.
After this, scroll a little up and click “Chan EQ.” If the button isn’t there by default, you can click on an empty cell and select the EQ plugin.

Step 3: Find and Filter the Undesired Frequencies
The screenshot below shows the bass EQ window in the track we are referring to.
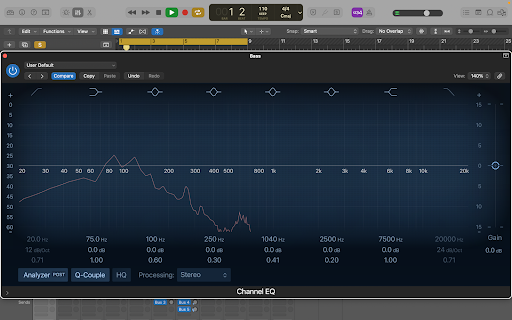
A “Stereo Channel EQ” showing bass frequencies reaching up to 1KHz, and spreading even further at times.
You can start with a mid-highs filter. Click on the 1040 Hz tab, and the filter will show up.
By clicking and scrolling the numbers (Hz, dB, and ratio), you can adjust frequencies, adjust the gain and increase or decrease filter strength.
The aim is to filter out all the frequencies that don’t lie in the bass’ natural sonic range. Also, it’s advisable to add a low-pass filter to eliminate extremely low frequencies that may make the track sound muddy.
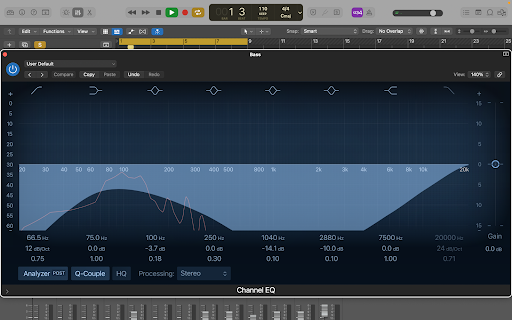
In the screenshot above, you can see an EQ window where the bass has been EQ’d.
To make your entire track sound clean, you should repeat this for every instrument, midi channel and pre-recorded sample in your song.
Apart from this, if you hear any specifically annoying or unpleasant frequencies in a stem, you can put a notch filter on those. Our other article on how to compose and produce music will help you eliminate those annoying mids, highs and lows across the frequency scale.
Panning
Ever noticed how in some songs, some instruments play in the left speaker while others play in the right one?
Also, in most cases, this doesn’t happen throughout the song, but at different points. This is the magic of panning.
Panning allows us to choose, where we would keep a particular instrument if our song was playing in a room, a hall, or any other place.
Importance
As panning allows us to place different instruments in different places (virtually) in our track, music producers can offer listeners a more personalized experience. For example, placing the instrument right behind the listener’s head will give them a different hearing experience than placing it in front of them or on their left or right.
For panning, there’s no right or wrong. Personal preference and the experience you wish to offer through your song should be your top priority.
How to do it?
Basic panning in LogicPro is probably the simplest part of this article.
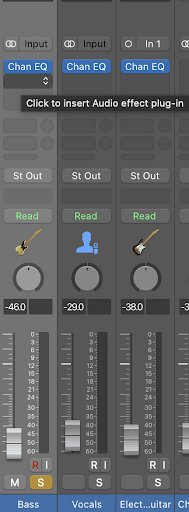
Every stem in your LogicPro track will have a knob, as highlighted (in red) in the screenshot below.
![]()
Turning this knob to the right will allow you to pan this particular track towards the right speaker. Similarly, turning it to the left will pan it to the left.
Now, if you want an instrument to have equal intensity in both speakers, you leave the knob in the center. However, if you want an instrument to go quiet in the right speaker, you turn it to the extreme left and vice versa.
Gain it Up!
Do you remember “gain staging” all the stems in the first step?
Once the mixing process is complete, it’s time to push the volumes up to your preferred levels. While mastering your track is a huge topic, which we’ll cover in future blogs, increasing the volume in different stems will be good to go on day 1.
Compare and Note the Differences!
Music production is a long game to master, and one can’t achieve perfection without tracking improvements.
Once the mixing, panning and volume setting is done, go back to your raw track and listen to it. Right after that, listen to your mixed track.
The idea is to observe and note which parts of the song sound better or worse. This will help you improve and will boost your confidence.
AI-based Unique Music Creation
Beatoven is an AI-based free online music composer tool that allows users to create music based on different moods, genres, regions, etc. To create your first track, click here, sign up and follow the step below.
How does it work?
Step 1: Create a New Track

After you click the “New Track,” button, a new page will open up. Here, you’ll be required to enter your details.

Choose the tempo and duration of the track and name your track.
Step 2: Pick Your Genre
Choose your preferred genre or regional sound on the next page.
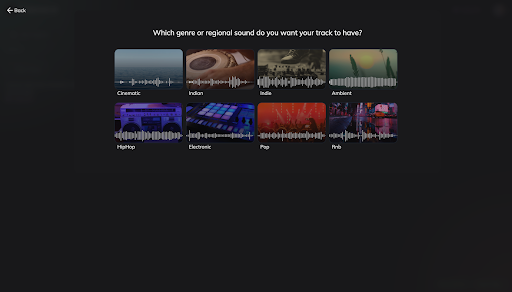
For this blog, we are choosing “Indian.” Once you’ve picked the genre, a new page will open up. Now you can select the mood of the track. For this guide, let’s select “Calm.”

Wallah! Your track is ready.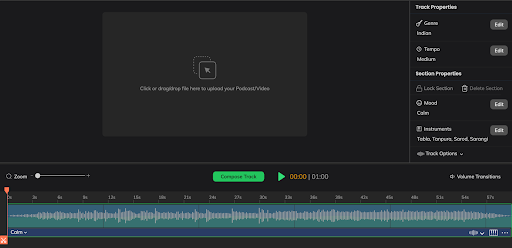
Step 3: Make Edits or Download
Now, you can also edit your track as you see. If the track sounds good to your taste, you can download it to your computer. This will be a royalty-free track and will be free to use.
Benefits
If you are a music producer, Beatoven can be your endless music library giving you access to hundreds and thousands of unique, royalty-free music samples and background tracks across all genres.
Beatoven.ai lets users create tracks according to their taste, mood and tempo by incorporating instruments from their selected genre.
Whether you are looking for a jumping ballad to play the piano on or a hip-hop drum beat to synth in your lead hook, Beatoven will quickly do the work for you. Plus, the music you make on Beatoven and the tracks you download from here will be high-quality, so manual mixing may not be required in most cases.
Conclusion
Through consistent practice and dedication, one can master the art of audio mixing and mastering and produce music that sounds great across all devices. In this beginner’s guide for mixing music, we discussed a range of tips and tricks to make your tracks sound more professional. Apart from that, beginner producers can use Beatoven’s AI-based production tool to create unique royalty-free music to charm up their tracks.
Hopefully, this was helpful.