
Background music and sound effects are important to video production and editing. The former helps evoke specific emotions and sets the tone for the viewer–whether to scare, excite, or calm the audience.
Sound effects add a sense of realism to the visual content. For example, adding a compelling soundtrack to your footage can create a deeper connection with viewers.
And thanks to modern video editing software, such as iMovie, embedding audio clips into your video file is as easy as ever.
In this blog, we will
1. Briefly introduce iMovie
2. Explain how to select appropriate audio tracks for video content
3. Discuss the sources for obtaining music files
4. Outline the three steps to adding music to videos in iMovie
5. Offer three advanced tips and tricks
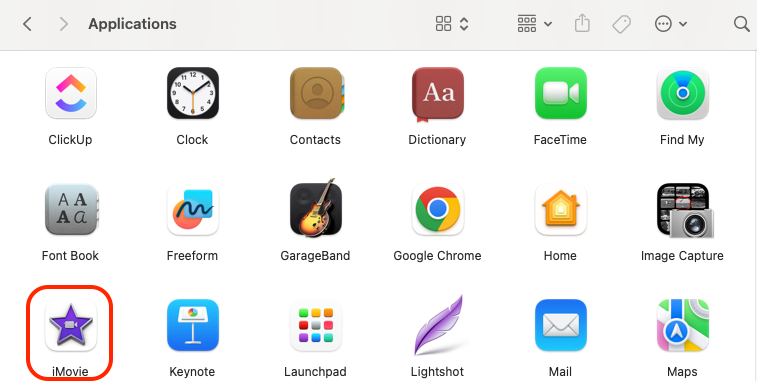
What is iMovie?
iMovie is Apple’s very own video editing tool, designed for Mac and iOS users.
One of the great things about iMovie is that it caters to beginner and seasoned editors alike thanks to its intuitive interface that simplifies video editing.
It works well for people who own Apple products, as the software is a standard inclusion.
Screenshot provided by author
Creators, students, and small business owners who don’t have the budget to purchase (and hire people to use) other software often resort to iMovie. It does a fantastic job creating videos for social media platforms like YouTube.
Whether for personal projects, educational purposes, or business videos, iMovie is a versatile tool for transforming raw footage into visually engaging stories.
Aside from the ability to add audio files to your video clips, iMovie offers:
Additionally, iMovie accepts all popular audio formats such as CAF, WAV, AIFF, AAC, M4A, and MP3 files.
In short, it has everything you need to create awesome videos.
How to select appropriate audio tracks for video content
Selecting the right audio for your videos is a critical aspect of video production that can significantly impact the viewer’s experience and emotional response.
Here’s how you can make informed choices.
Understanding the video’s tone and purpose
Here’s an example: if you’re in the gaming industry and looking to showcase your latest PC games, adding music to your iMovie project can create an impactful introduction video.
Incorporating game footage alongside a compelling soundtrack can highlight the game’s atmosphere and draw in your target audience.
If you’re creating a corporate video meant to inspire and motivate employees, you’ll want to choose uplifting and energetic music. In contrast, a documentary about a serious subject would benefit from more subdued and reflective music to match the gravity of the content.
For a travel vlog showcasing vibrant city life, upbeat and lively music can enhance the dynamic visuals and convey the excitement of the destination. Alternatively, a meditation music video would require tranquil and soothing sounds to help viewers relax.
Matching music tempo with video pace
Fast-paced videos, like sports highlights or fast-moving tutorials, pair well with high-tempo tracks that maintain the viewer’s attention and match the video’s energy.
To fine-tune your projects, using any free video editing software can help you seamlessly integrate music that complements your video’s rhythm and style.
In a high-energy fitness video, a fast-paced, rhythmic soundtrack can synchronize with the exercise movements, enhancing the viewer’s engagement and motivation for performing the exercise.
Conversely, a slow-motion artistic montage of nature would benefit from a slower, more atmospheric track accentuating the visuals’ grace and beauty.
Brand personality
Of course, the type of video you are making is the main thing to consider during production. However, don’t stop there. You should also consider your brand personality before diving too deep into the music selection process.
After all, you don’t want to choose music that’s the opposite of your brand’s identity. Doing so can confuse your audience or prevent you from making a lasting impression.
Need inspiration from a brand that pays special attention to this aspect? This Cloudbeds video is an excellent example.

They intend to promote their front office management system, channel manager, PMS system, and more, but they do it in a joking and fun way with a small sketch. And you can notice that the music they use matches the energy of the whole video, which is also a direct reflection of their brand personality.
Keep testing
Before finalizing your audio choice, test it with your visuals to ensure it complements the video. Watch the combined audiovisual product to assess whether the music supports the video content without overwhelming it.
For example, after editing a wedding video, you might test several music options to find one that enhances the romantic and celebratory footage.
A classical piece might evoke elegance and timelessness, while a contemporary love song could add modern warmth and intimacy.
Sources of obtaining audio tracks
It’s crucial to ensure you obtain the necessary permissions for your chosen selection of background sounds — the last thing you want to do is breach copyright and get a fine.
Here are some sources of free background audio:
1. YouTube audio library
2. Free Music Archive
3. Purple Planet
4. Incompetech
5. Canva (free)
6. Freesound
7. Bensound
Paid sources include
1. Canva (premium)
2. Epidemic Sound
3. PremiumBeat
4. AudioJungle
5. Musicbed
6. Pond5
7. Artlist
Make sure you abide by licensing rules. Just because an audio file is free to use doesn’t mean there aren’t other restrictions, such as the need to attribute the original author or the prohibition on using audio for promotional videos.
Here’s an overview of the types of music licensing. Always check the specific website’s usage terms.
1. Royalty-free music: This isn’t always free of charge. It means you don’t have to pay any subsequent royalty fees after the initial purchase.
2. Creative Commons license: This is a public license granted by artists who wish to share their work with others under specific conditions. There are several types of Creative Commons licenses, each with its own set of restrictions and allowances, such as attribution requirements or non-commercial usage only.
3. Synchronization license: A specific license for any music paired with video footage.
4. Master license: When you desire to use a particular recorded rendition of a song.
If you don’t have the time or patience to work out usage issues, why not create your own music from scratch using AI? Beatoven.ai makes it easy. You can either describe the music you want or choose a desired tempo, genre, and emotion, and it’ll create something never heard before!
How to add music to iMovie in 3 steps
Now that we have reviewed the preliminaries, let’s discuss adding sound clips and audio effects to your video via iMovie.
Step 1: Create your iMovie project
Skip this part if you already have your video clips laid out and ready in an iMovie project. If you don’t, you need to:
1. Open iMovie
2. Click “Create new”
3. Select “Movie”
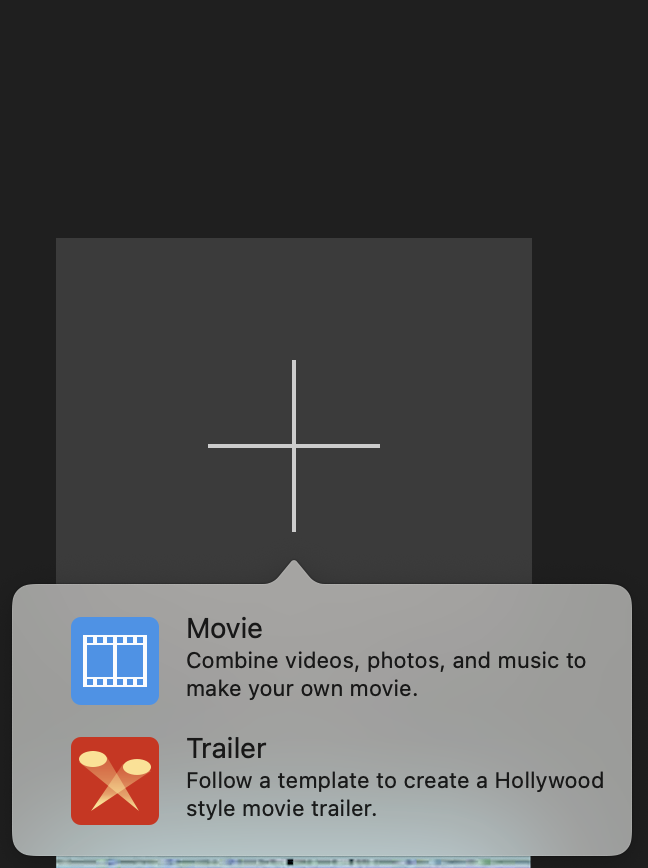
You’ll be presented with the main iMovie interface. Here is where you’ll build your video.
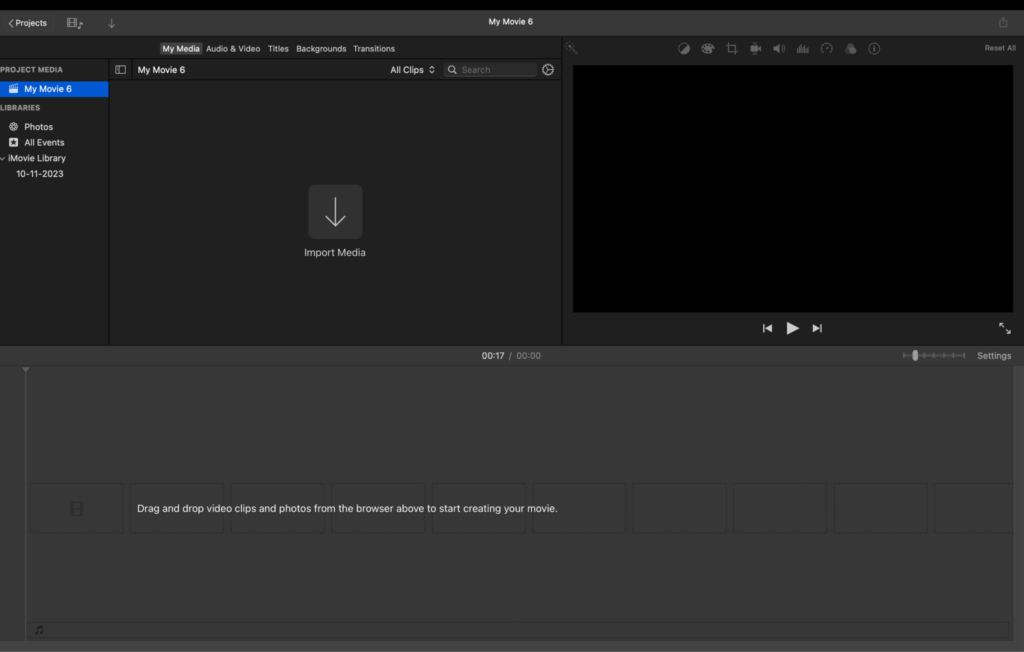
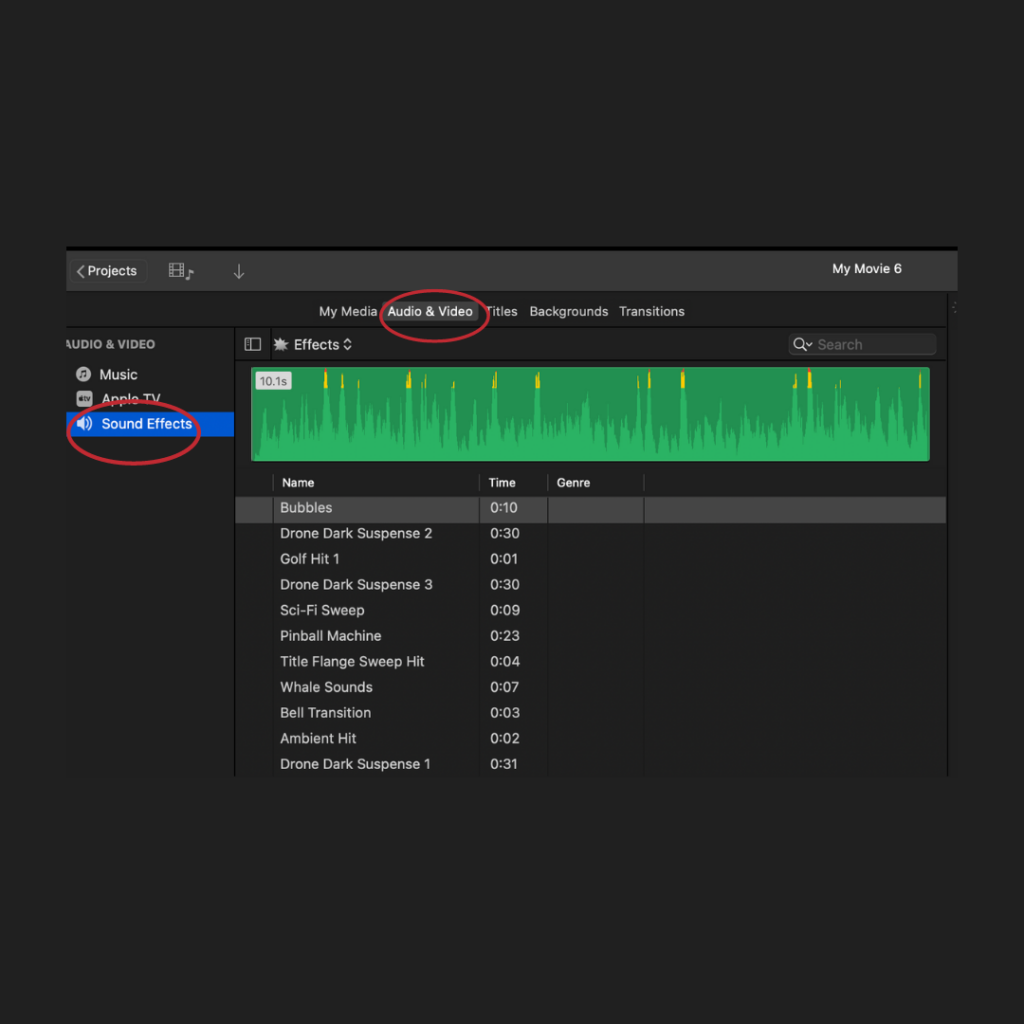
Step 2: Importing audio files
Click on:
1. My media
2. Import media
Select the necessary audio files from your music library (you can also add video files in the same way).
If you work with two screens, you can put your Apple Finder on one screen and drag and drop the files.

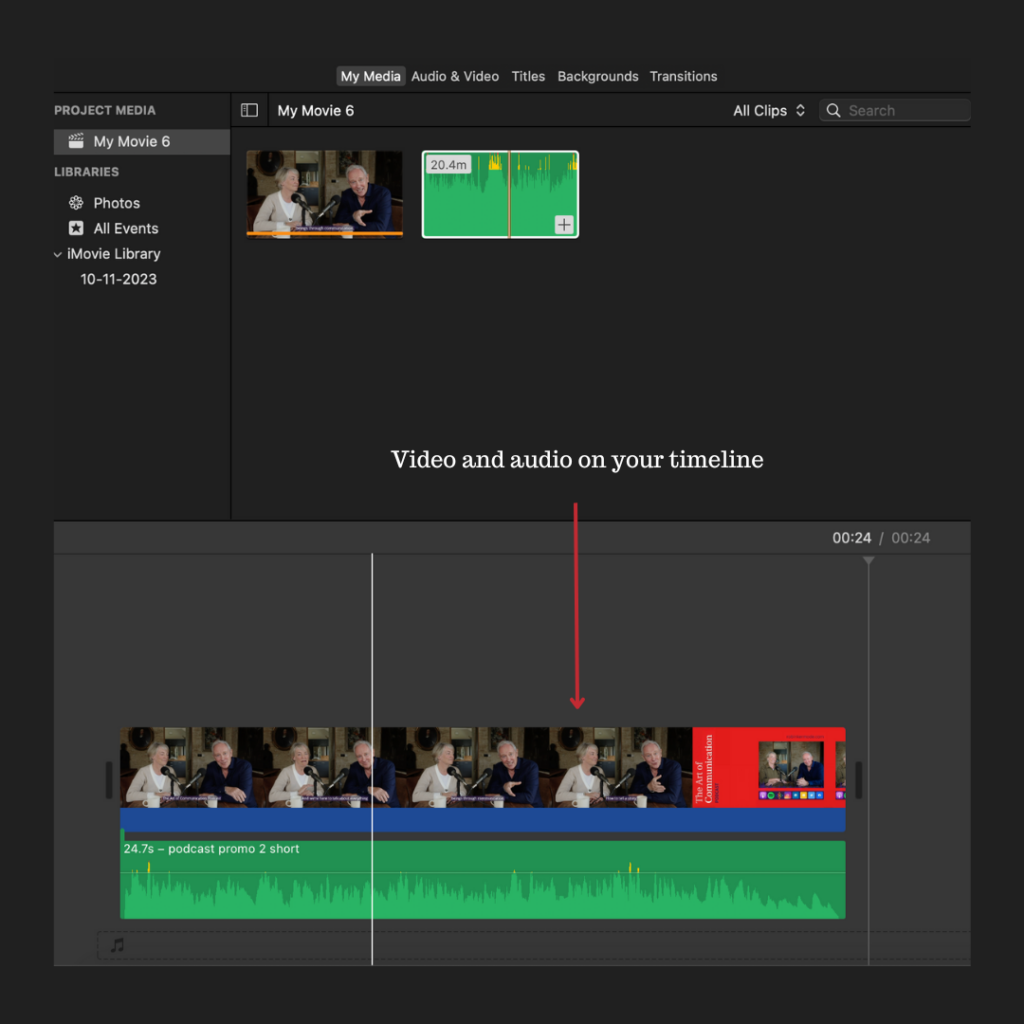
At this point, the audio hasn’t been added to the movie itself. It’s sitting in your iMovie library. Select the file and drag it onto the main timeline to add it to your video clip. Once on the timeline, shift it to the desired position in your video.

Step 3: Editing and adjusting the music track
There are various edits you can make to the audio track:
Change its length
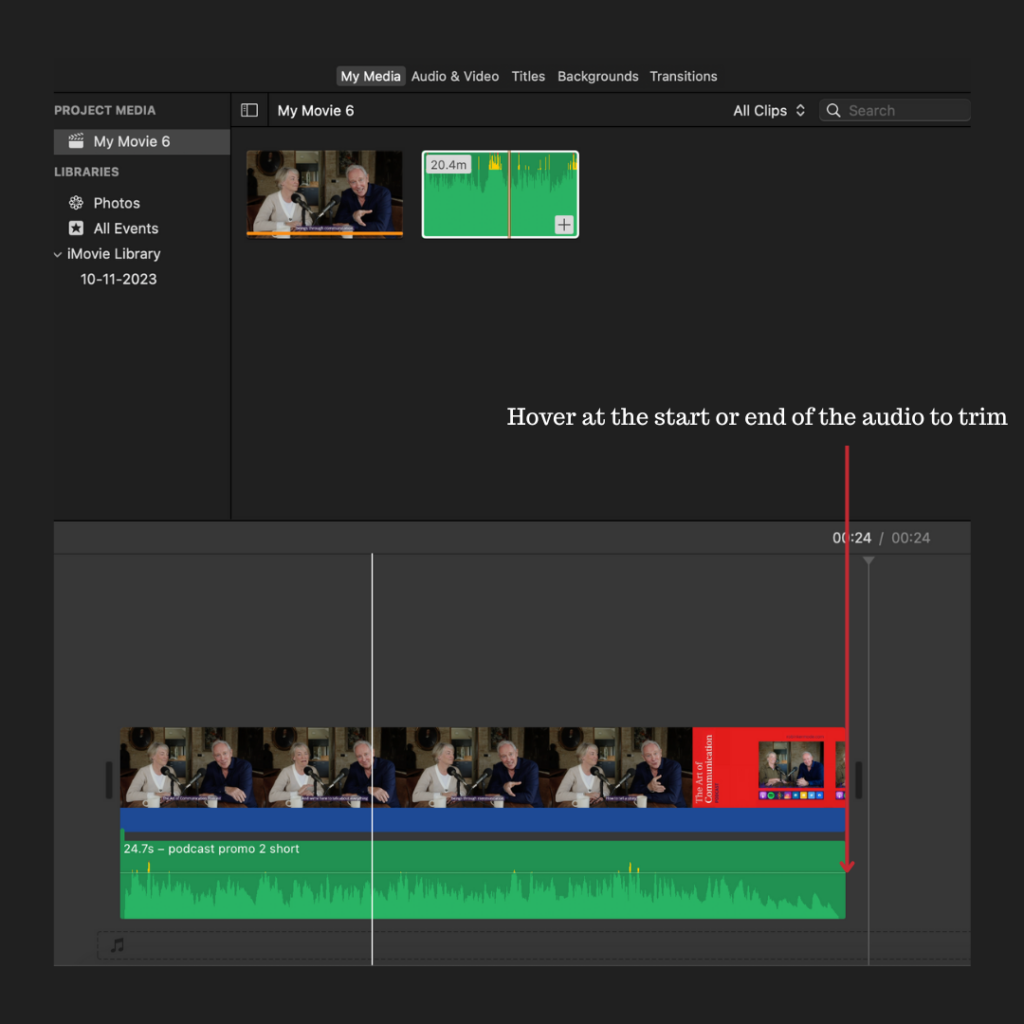
If you don’t want certain parts of the audio included, you can use the trim feature to make it the desired length.
Change its volume
If your audio track is of low quality, you can salvage it by increasing its volume. You might want to adjust the volume to match the video’s ambiance.

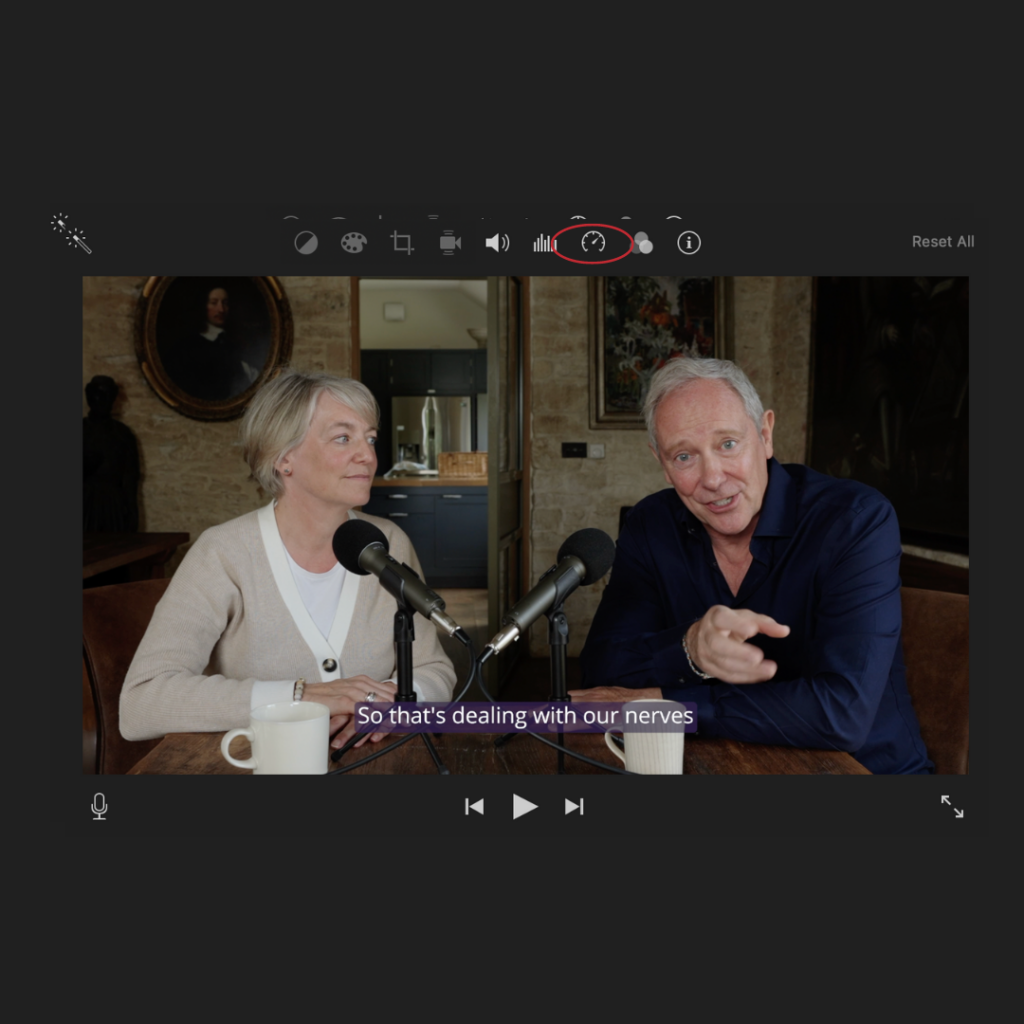
Change its speed
You can speed up or slow down the background music clip. Select a pre-made option or click “custom” to make it bespoke.
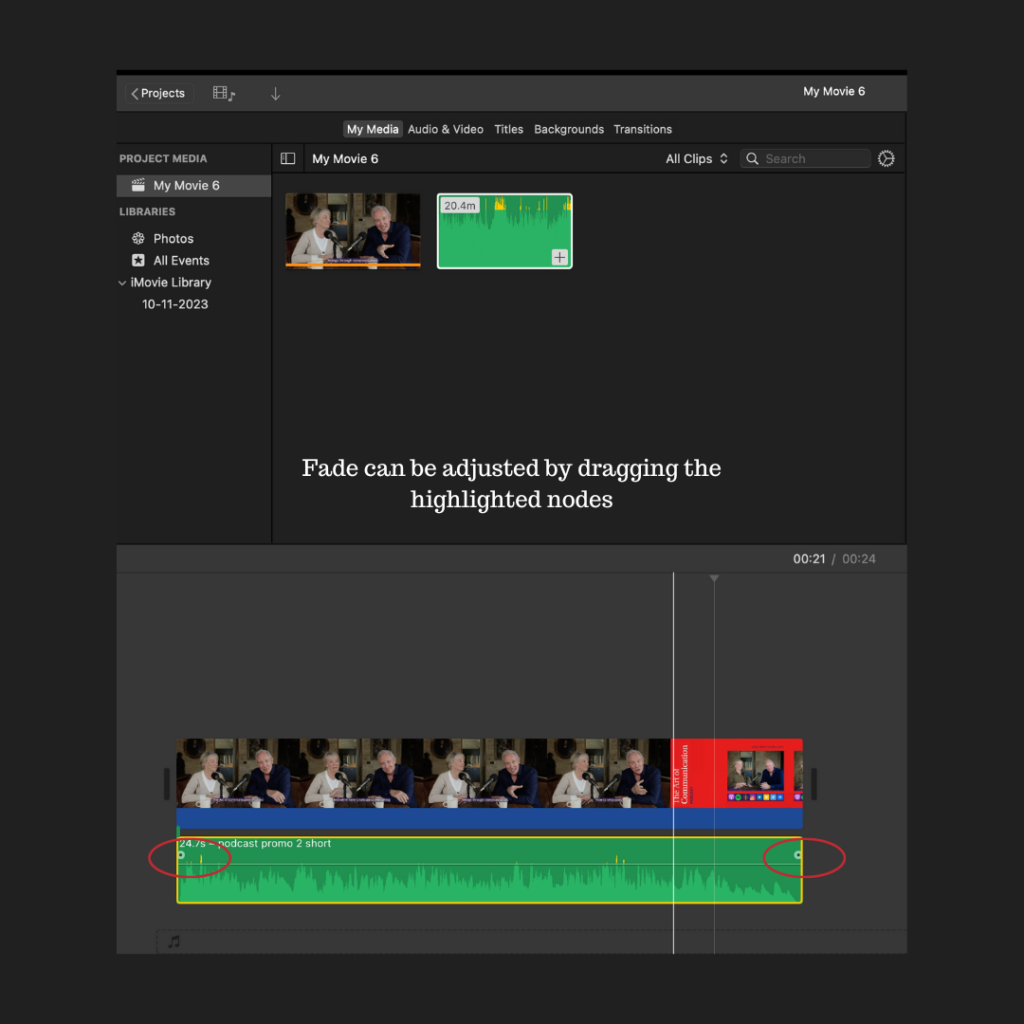
Add fade effects
To fade in/out the music, click this pointer and adjust to your desired fade intensity.
And that’s all there’s to it. Apple’s video editor is intuitive, and you’ll pick it up quickly.
3 advanced tips and tricks
If you’re already comfortable using iMovie and want to take things to the next level, consider these tips and tricks.
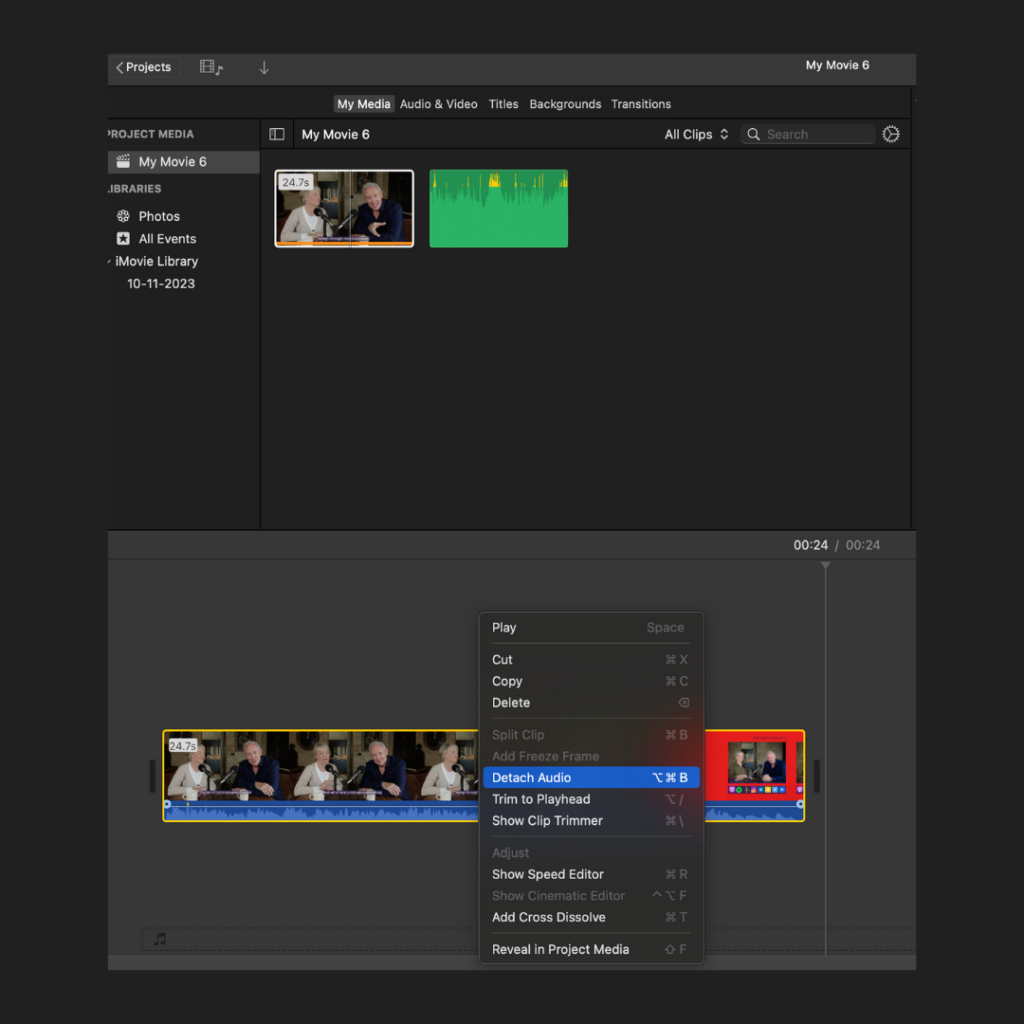
Detaching native audio from videos
If your existing video clip has native audio you want to remove, right-click your mouse button and select “detach audio.” It’ll detach the audio from the video.
You’ll know it’s detached because the audio clip will have its own timeline. You can then delete native audio if you want it replaced with another audio clip.
Once detached, a separate timeline from the audio will appear. You can then highlight the audio timeline and hit delete.
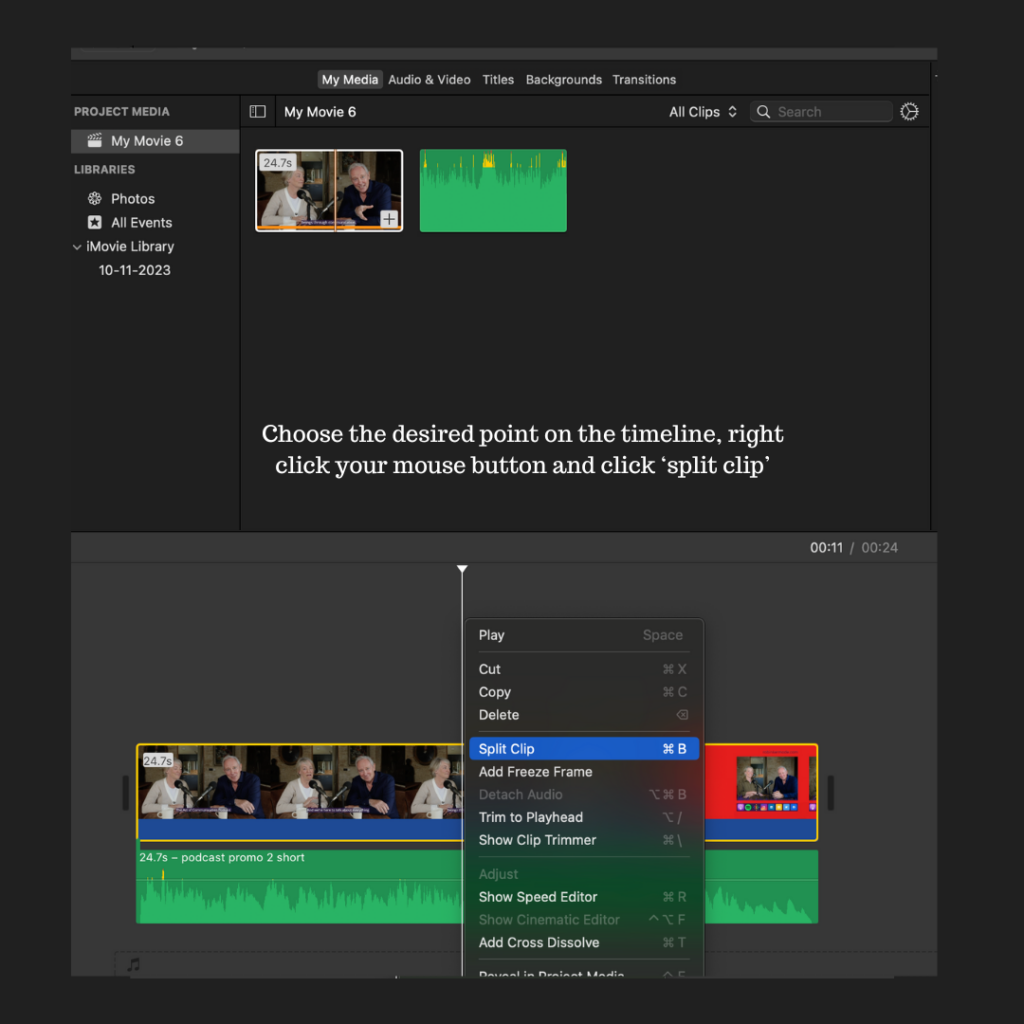
If you want to use part of the audio, you can trim it (as above) or choose a specific part of the audio to split it.
Reducing background noise
It’s challenging to reduce background noises when shooting outdoors. Luckily, iMovie has a simple-to-use noise reduction feature.
This will reduce any unwanted background noise from the video and help your background music sound crisper and sharper.

Adding audio effects
You can add various effects to the audio in your native video (along with your chosen background music) if necessary.
You can also mimic in-person settings, such as the pitch, tone, and acoustics of various room sizes or types.
Wrapping up
It’s no exaggeration to say audio can make or break a video. We hope these detailed steps (and a few extra tips) make adding audio to videos easier for you.
Remember to experiment, and most importantly, have fun with it!
And if you want to create something totally unique despite not being a music producer, consider Beatoven.ai. It can create anything you want with a simple prompt! Get started for free.
Author bio

Arif Bharakda is a versatile writer passionate about marketing, technology, and B2B insights. With a keen interest in personal growth, Arif brings a relatable perspective to complex topics, making them accessible to all readers.